

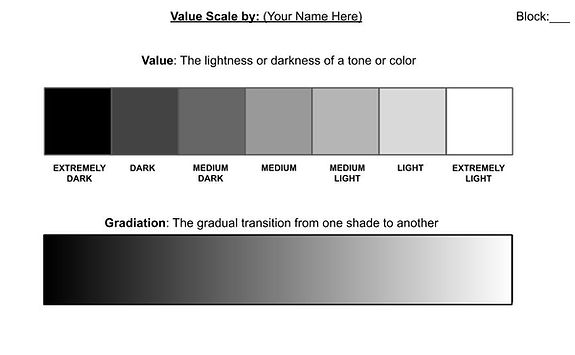
VALUE SCALE

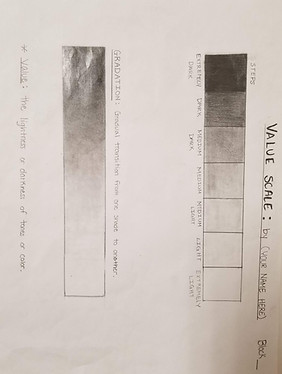
Step 1: Measure a Scale
-
Create a value scale
-
Turn a white sheet of paper horizontal
-
Write “ VALUE SCALE and put your name at the top with block.
-
Make a rectangular strip 1” x 7”.
-
Define value
-

Step 2: Make a Grid
-
Measure the first strip 1” x 7” long.
-
Make marks on both bottom and top lines and connect with ruler Do not guess.
-
.jpg)
Step 3: Label the Values
-
Write under the boxes (in order) Extremely Dark, Dark, Medium, Medium Light, Light, Extremely Light. (Extremely light is the white of the paper)
-
Shade the Extremely Dark box as dark as you can with your pencil by applying pressure to the pencil.
-
Levave the Extremely Light box empty.
-
.jpg)
Step 4: Shade the Values
-
Shade the Extremely Dark box as dark as you can with your pencil by applying pressure to the pencil.
- Gradually shade each box accordingly.
-
Leave the Extremely Light box empty.
.jpg)
Step 5: Gradiation Scale
-
Write: “Gradation” above the rectangle and write the definition.
-
DO NOT put in lines between each step. This needs to be a gradual transition of values.
.jpg)
Step 6: Gradiation Shade
-
Shade in the rectangle from dark to light.
-
NO pencil lines should show (use tortillion to blend evenly).
.jpg)
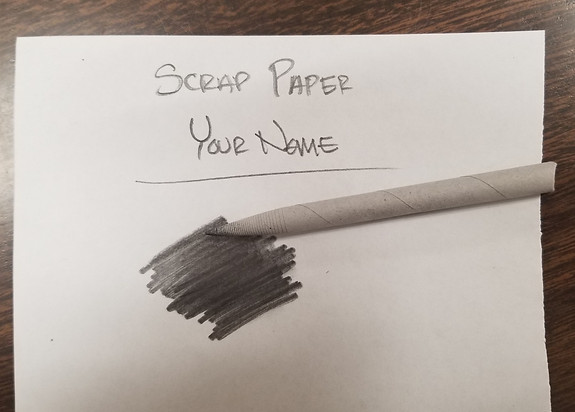
How to use a shader
-
Intro to tortillion (shader):
-
Use on the side of the tip
-
Can “load” with lead on scrap paper
-
Shade in circular motion to blend in lines
-
Made from rolled paper: DO NOT sharpen
-
Turn in your paper
-
E-Learning: Take a picture of your value scale with your phone or computer and turn it in on the shared folder.
-
Make sure you rename the photo with your name.
-
-
In class: Put it in your sketchbook folder so it is ready to be turned in.

ExtraHelp
Here are a few helpful videos: